Preparation
Let’s get your Raspberry Pi up and running with the operating system and the Smart Panel software. This part will walk you through flashing the SD card and doing the first boot.
The easiest and most reliable way is to use the Raspberry Pi Imager.
Recommended: Using Raspberry Pi Imager
Download Raspberry Pi Imager
You can get the Raspberry Pi Imager from the official site:
https://www.raspberrypi.com/software
It’s available for Windows, macOS, and Linux.
Insert the SD Card
Insert a microSD card (at least 8GB recommended) into your computer’s card reader.
Choose Operating System
In Raspberry Pi Imager:
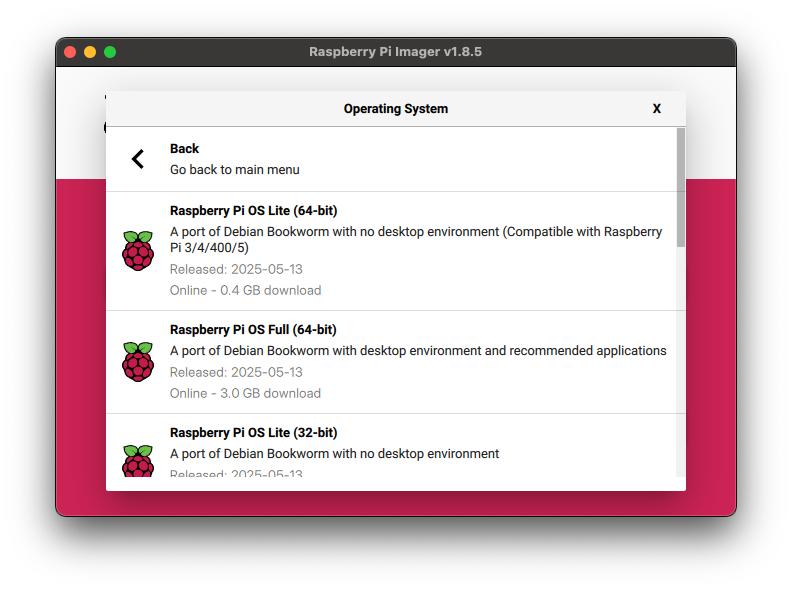
- Click Choose OS
- Select Raspberry Pi OS Lite (64-bit) (This is a lightweight, headless version perfect for embedded panels)
Configure Advanced Options
Click the Next and then Edit settings.
Set the following:
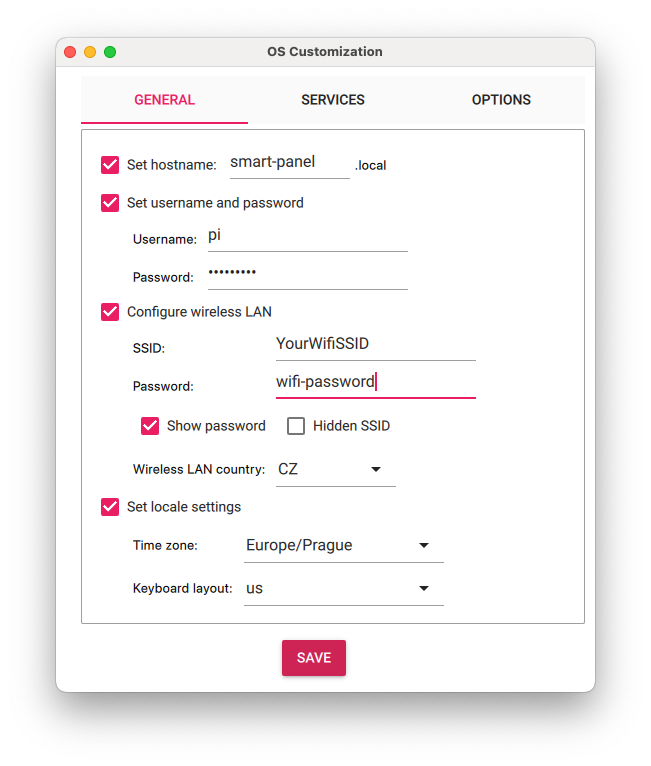
On the General tab:
- Set username and password (e.g. pi / raspberry)
- Configure Wi-Fi (SSID, password, country)
- Set hostname (e.g. smart-panel.local)
On the Services tab:
- Enable SSH
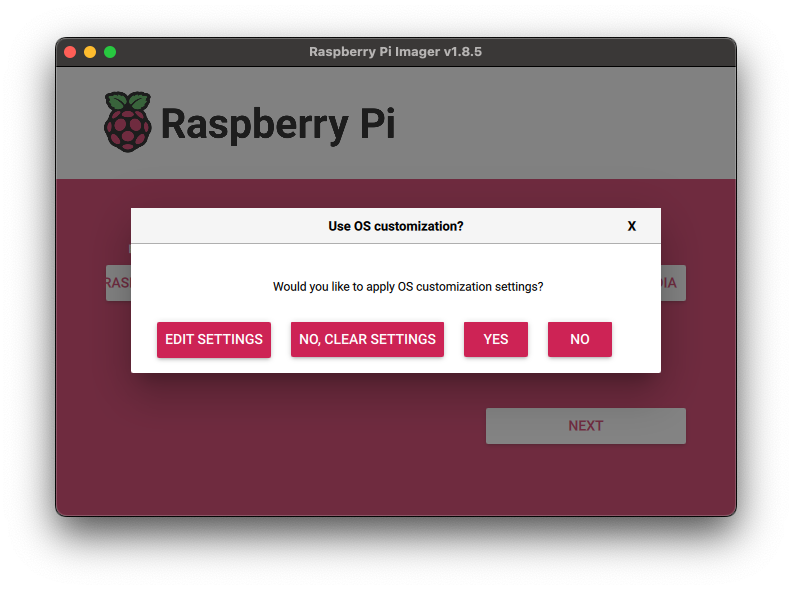
These options are saved per session. You can optionally make them default for future flashes.
When finished, click Yes to apply the settings.
Flash the OS
Click Yes to begin flashing the image. This may take a few minutes.
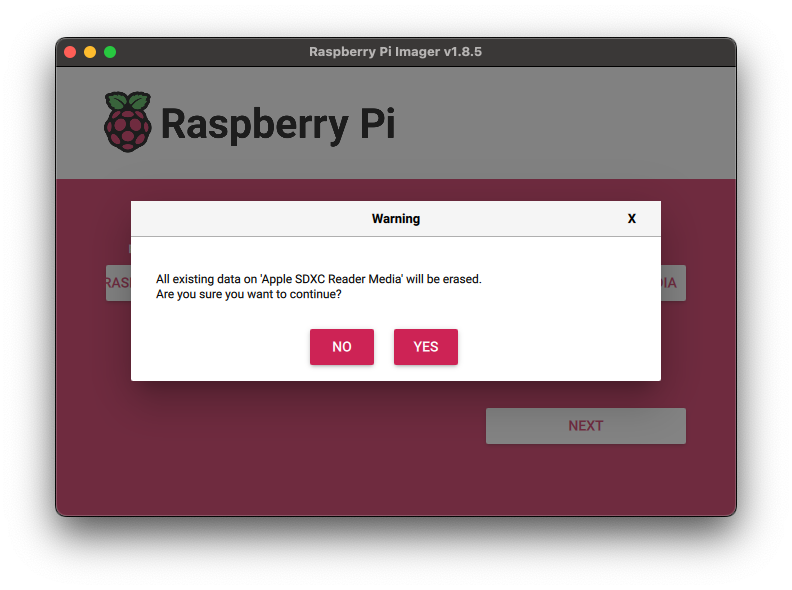
Once done, remove the SD card safely and insert it into your Raspberry Pi.
Advanced: Using Balena Etcher
If you’re a more advanced user or prefer full control, you can flash the image manually using balenaEtcher
Download the OS
We recommend using Raspberry Pi OS Lite , since it’s lightweight and ideal for embedded use.
Flash the SD Card
- Insert the microSD card into your computer.
- Use Etcher to write the OS image.
- Once flashing is done, don’t remove the card just yet!
Enable Wi-Fi
Create a file named wpa_supplicant.conf with your Wi-Fi credentials:
country=CZ
ctrl_interface=DIR=/var/run/wpa_supplicant GROUP=netdev
update_config=1

network={
	ssid="YourSSID"
	psk="YourPassword"
}
Enable SSH
Create an empty file called ssh (with no extension) to enable SSH.
Finalize
Save both files in the boot partition before inserting the SD card into your Pi.
First Boot
- Insert the microSD into the Pi.
- Power it on.
- Wait a minute or two for the initial setup.
You can connect to your Pi via SSH using:
ssh pi@raspberrypi.localDefault password: raspberry
What’s Next?
Once the Pi is online and accessible, you’re ready to install the Smart Panel backend and panel app.
👉 Head over to the Installation section.